

 illustration from Gemini
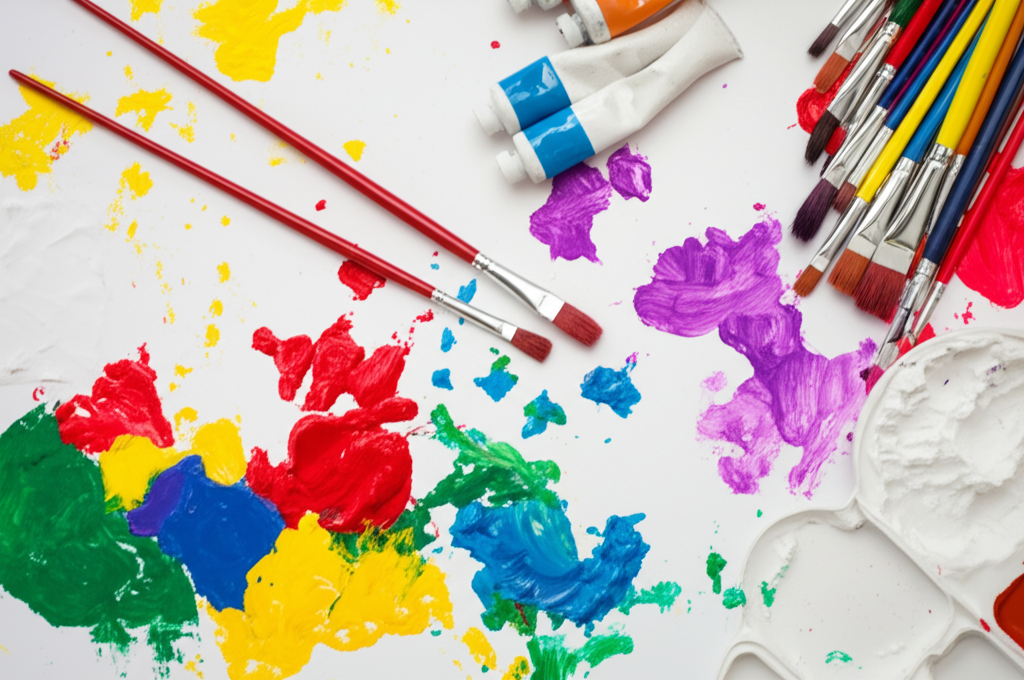
Creative Canvas: Fun & Easy Painting Techniques for Young Artists
Open up a world of color and imagination for your child! This guide explores a variety of fun and accessible painting techniques for kids, perfect for turning any day into an artistic adventure. Discover simple methods and creative art projects for kids that will spark joy, build skills, and make lasting memories. Let's get painting!
The Developmental Magic of Painting for Children
Painting offers far more than just a pretty picture; it's a vital activity for growth. Engaging in painting activities for kids delivers significant developmental advantages:
- Boosts Fine Motor Skills: Gripping brushes, mixing colors, and applying paint sharpens hand-eye coordination and strengthens finger dexterity.
- Ignites Creativity & Imagination: A blank page offers endless possibilities for children to express unique ideas and bring imaginative worlds to life.
- Supports Emotional Expression: Art provides a safe and effective outlet for children to communicate feelings they might not have words for.
- Enhances Cognitive Abilities: Painting encourages problem-solving, understanding spatial relationships, and learning about colors.
- Builds Self-Confidence: Finishing an artwork fosters a sense of achievement and boosts self-esteem.
Incorporating easy painting ideas for kids into their playtime is an investment in their holistic development and can cultivate a lifelong appreciation for the arts.
Gathering Your Art Supplies
Before the fun begins, let's assemble the tools. Here’s a checklist of essential painting supplies:
- Kid-Friendly Paints: Always choose non-toxic, washable paints. Tempera paints are excellent for beginners – affordable and bright. Acrylics work well for older kids tackling more detailed projects.
- Assorted Brushes: Include various sizes and shapes (round, flat, sponge) to experiment with different effects and strokes.
- Sturdy Paper: Opt for thicker paper like cardstock or watercolor paper that can handle paint without tearing or buckling easily.
- Mixing Palette: A simple plate or a dedicated plastic palette works perfectly for blending colors.
- Water Cup: Keep clean water nearby for rinsing brushes between colors.
- Surface Protection: Use newspaper, a drop cloth, or a plastic tablecloth to cover your table or floor.
- Art Smock or Old Clothes: Protect clothing from inevitable splatters and spills.
- Sponges: Useful for texture techniques and sponge painting.
- Optional Extras: Depending on the project, you might need masking tape, cotton swabs, salt, straws, marbles, or natural items like leaves.
Quality supplies can improve the experience, but remember, creativity is key! Always supervise young children during art activities.
Exploring Exciting Painting Techniques
Let's dive into the colorful world of different painting techniques for kids! These methods are designed for fun and can be adapted for various ages.
1. Classic Brush Painting
The starting point for most artists! Encourage exploration with various brush movements:
- Dabbing: Creating dots or textures with the brush tip.
- Stroking: Making smooth, flowing lines.
- Swirling: Using circular motions for patterns.
- Layering: Applying colors over dried layers for depth.
Tip: Offer different brush types and see what amazing effects your child discovers!
2. Sponge Painting Fun
An easy win for texture! Dip a sponge lightly in paint and press or dab it onto the paper.
- Natural Sea Sponges: Create unique, organic patterns.
- Kitchen Sponges: Can be cut into shapes (stars, circles) for stamping.
Tip: Layering different colors with sponges creates beautiful, textured results.
3. Sensory Finger Painting
A fantastic sensory experience! Let kids dip their fingers directly into washable, non-toxic paint and spread it on the paper.
- Embrace the Mess: Protect surfaces and clothing!
- Focus on Feeling: Encourage kids to enjoy the tactile sensation.
Tip: Combine with drawing tools or brushes once the base layer is down.
4. Energetic Splatter Painting
Unleash some energy! Dip an old toothbrush or stiff brush into watery paint and flick the bristles towards the paper.
- Control the Chaos: Experiment with distance and force for different splatter sizes.
- Protect the Area: This one can get messy – ideal for outdoors or a well-covered space.
Tip: Mask off areas with paper or tape before splattering for cool negative space effects.
5. Artistic Drip Painting
Create flowing, abstract designs by letting thinned paint drip down the paper.
- Thin the Paint: Add a little water to make it drip easily.
- Tilt and Turn: Hold the paper upright or tilt it to guide the drips.
- Experiment with Tools: Use brushes, droppers, or squeeze bottles.
Tip: Overlapping drips of different colors creates interesting blends.
6. Whimsical Marble Painting
A magical process with surprising results! Place paper inside a shallow box or tray, add dabs of paint, drop in a few marbles, and tilt the box to roll them through the paint.
- Contain the Roll: The box keeps marbles from escaping.
- Color Mix Fun: Use multiple paint colors for swirling effects.
Tip: Ensure the paper fits snugly in the box bottom.
7. Breezy Blow Painting
Use air power! Place a drop of watery paint on the paper and use a straw to blow it across the surface, creating delicate, branching patterns.
- Watery Consistency: Paint needs to be thin enough to move easily.
- Supervise Closely: Ensure children blow through the straw, not inhale.
Tip: Blow from different angles to change the pattern's direction.
8. Sharp Tape Resist Painting
Create clean lines and shapes using masking tape. Apply tape to the paper, paint over the entire surface (including the tape), let it dry, and then carefully peel the tape away.
- Press Tape Firmly: Ensure edges are sealed to prevent paint bleeding underneath.
- Peel When Dry: Remove tape slowly once the paint is fully dry.
Tip: Perfect for geometric designs, initials, or creating borders.
9. Textured Salt Painting
A fascinating technique combining paint and science! Apply watercolor paint (or thinned tempera) to paper, then sprinkle table salt over the wet paint.
- Work While Wet: Salt needs to be applied before the paint dries.
- Let it Dry Completely: Allow ample time for the magic to happen.
- Brush Off Excess: Gently brush away loose salt to reveal sparkling texture.
Tip: Works beautifully for starry nights, frosty scenes, or abstract textures.
10. Earthy Nature Painting
Use elements from the outdoors as natural stamps! Collect leaves, twigs, flower petals, or rocks.
- Apply Paint to Object: Brush paint onto the textured side of a leaf or other item.
- Press Firmly: Carefully press the painted object onto the paper like a stamp.
Tip: A wonderful way to combine a nature walk with an art session.
Tailoring Techniques to Age Groups
Adapt these painting techniques for kids based on their developmental stage:
- Toddlers (1-3): Focus on sensory fun like finger painting and chunky brushes. Prioritize non-toxic, washable materials and close supervision.
- Preschoolers (3-5): Introduce basic brush control, sponge painting, color mixing, and simple shapes. Encourage imaginative expression.
- School-Aged Kids (6-12): Explore techniques like splatter, drip, tape resist, and salt painting. Introduce basic concepts like background/foreground.
- Teens (13+): Encourage experimentation with acrylics, advanced techniques, composition, and exploring personal style.
Always tailor the activity to the child's interest and ability, keeping the focus on enjoyment and exploration.
Tips for a Happy Painting Experience
Set the stage for creative success with these simple tips:
- Prepare Your Zone: Cover surfaces, ensure good lighting, and have supplies within reach.
- Dress for Mess: Use smocks or old clothes.
- Embrace Experimentation: Let kids explore colors and techniques freely. There's no right or wrong!
- Focus on Process, Not Perfection: Praise effort and exploration rather than just the final product.
- Make Cleanup Collaborative: Involve kids in washing brushes and tidying up.
Essential Safety Reminders
Keep art time safe and fun:
- Choose Non-Toxic: Always select art supplies specifically labeled non-toxic and safe for children.
- Supervise Actively: Keep a watchful eye, especially with younger children.
- Ensure Good Airflow: Paint in a well-ventilated area if using materials with any odor.
- Wash Up Afterwards: Ensure hands (and any painted body parts!) are washed thoroughly.
- Store Safely: Keep paints and tools stored securely away from very young children and pets.
Conclusion: Cultivating Creativity with Paint
Exploring different painting techniques for kids is a fantastic avenue for nurturing creativity, enhancing skills, and simply having fun together. From simple dabs to exciting splatters, there's a method to capture every child's interest. Gather your supplies, let imaginations run wild, and start your colorful adventure today!
Feeling inspired? Share this guide with fellow parents and educators! What painting activities do your kids love most? Let us know in the comments!
Published on April 27, 2025
reference: Various Article on internet
Share to:
![]()
![]()
![]()
![]()
![]()

Gema
Wordsmith and content writer passionate about creating high-quality content that informs, entertains, and inspires. Let me bring your brand's story to life.
All stories by : GemaRelated Posts
-
April 1, 2025
Cooking Adventures: Easy and Delicious Recipes Kid...
-
June 29, 2025
Raising Twins: More Like Taming Tigers?
0 Comments